Configure Project - Navisworks
After the Clash Reports are generated for the first time, the project
needs to be configured.
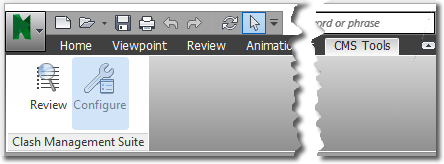
- Click the Configure
button on the CMS
Tools
tab.

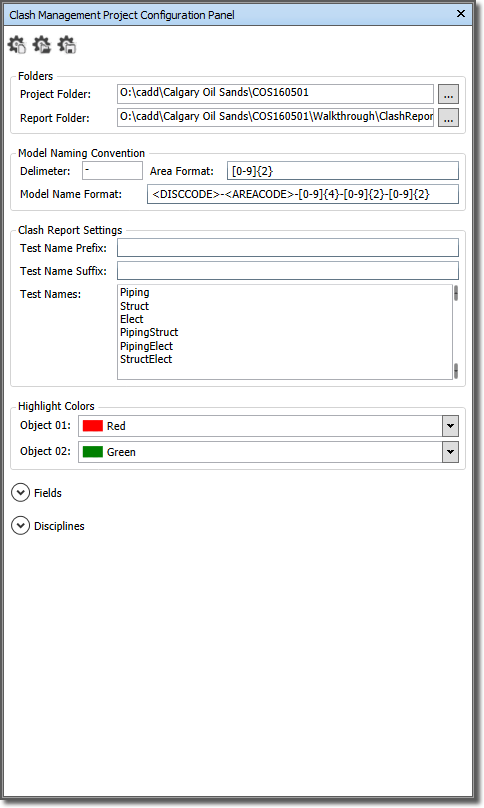
- Use the form to configure the project

- Folders
- Fill in the Project Folder
- Select the location for the Clash Tests
- Clash Report Settings
If your Clash File names have a Common prefix, and or Suffix,
they can be defined here.
Example:
Model Name: PIP-01-1000-01-01
Prefix = A<AREACODE>_
Suffix = _<DISCCODE>
Clash Report File Name = A01_Piping_PIP.xml
- Define the Clash Report Prefix, optional
- Define the Clash Report Suffix, optional
- Clash Report Names
Enter the Clash Test Names, by Discipline. Using
the optional Prefix, and Suffix they should match
the xml files in the Clash Results Folder.
- Define Project Settings
Use Regular Expressions and Fields to define the formats
- Enter the delimiter used in the Model name, if required
- Enter the Area Format
- Enter the Model Name Format
- Highlight Colors
The default colors are the standard Navisworks Colors (Red for Clash Member 1, Green for Clash Member 2)
- Define the object colors for highlighting the clash
objects.
- Fields

Define custom fields that build the file name and folders.
Fields are essentially place holders that are replaced
with the corresponding values in the model name.
- Disciplines

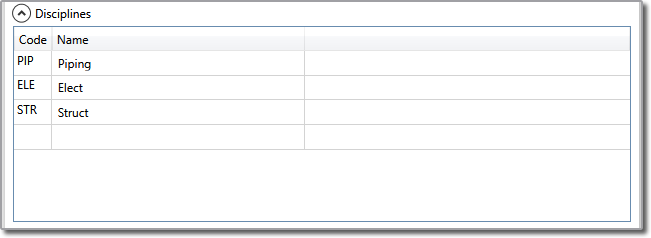
Map your company's Discipline Codes to the Clash Test Name.
This limits the Clash Test dropdown list to display
only clash tests with the current model discipline in the
clash test Name.
Example:
Model Name: PIP-01-1000-01-01
Example:
Model Name: PIP-01-1000-01-01
<DISCCODE> = Piping
<AREACODE> = 01
Clash Report Folder = O:\cadd\Calgary
Oil Sands\COS160501\Walkthrough\ClashReports\A01


